Showing posts with label childrens portraits. Show all posts
Showing posts with label childrens portraits. Show all posts
Tuesday, April 6, 2010
Come for the Coffee, Stay for the Overcast Skies
Seattle is my home, always will be (if I can help it). I love it here. Coffee shops out number natives two to one. Everyone dresses like they are ready to go hiking at all times. And it rains, more then I care to admit. Yes, when you live in a place where everyone is suffering from seasonal depression, your false god of choice is the sun.

To this point, today I photographed my son Tyler minutes before the rain began to fall. In any other place common wisdom would suggest that today wasn't the right day to trespass into a secluded car graveyard with preschooler and camera in hand. (Some of you are thinking- it's NEVER a good idea to trespass. You are correct; but I lean towards getting the shot and then asking forgiveness later.) The reason I was so willing to risk rain and hillbilly gun fire was the light. Perfect, seductive, overcast light.
The combination of high clouds bloated with moisture and the noon day sun makes a celestial soft box that will softy kiss the cheek of any subject and provide delicious saturated colors. Minimal work, I just have to be there. Joe McNally's blog (which I highly recommend) spoke of this back in Feb. As a photographer we wait on the light, we are subject to it's every whim, and love every moment.
Tyler on the other hand was not so enthusiastic. The clouds and approaching storm meant cool temperatures and wind that he said "hurts my eyes." I bribed him heavily and he smiled about three times.
The real magic of this photo I think is the shoes. The red pop is really nice and the color on the car is classic. I did however enhance it slightly. This is an easy trick though. Create a layer in photoshop and set it to color mode with about 20-30% opacity. Then chose a deep rich color and paint on your layer. The color will be applied to the image. I made several different color layers with different tonalities and opacities to achive the desired look. The rope was also traffic cone orange in the original image. I toned it down by adding a slight green on one of my color layers. Finally I increased the saturation and contrast slightly, watching carefully to avoid loosing information in the highlights and done! The 24x36 gallery wrap print is already set to be ordered and placed above my fireplace (with the images of his sister and brother of course) in just a few weeks.

To this point, today I photographed my son Tyler minutes before the rain began to fall. In any other place common wisdom would suggest that today wasn't the right day to trespass into a secluded car graveyard with preschooler and camera in hand. (Some of you are thinking- it's NEVER a good idea to trespass. You are correct; but I lean towards getting the shot and then asking forgiveness later.) The reason I was so willing to risk rain and hillbilly gun fire was the light. Perfect, seductive, overcast light.
The combination of high clouds bloated with moisture and the noon day sun makes a celestial soft box that will softy kiss the cheek of any subject and provide delicious saturated colors. Minimal work, I just have to be there. Joe McNally's blog (which I highly recommend) spoke of this back in Feb. As a photographer we wait on the light, we are subject to it's every whim, and love every moment.
Tyler on the other hand was not so enthusiastic. The clouds and approaching storm meant cool temperatures and wind that he said "hurts my eyes." I bribed him heavily and he smiled about three times.
The real magic of this photo I think is the shoes. The red pop is really nice and the color on the car is classic. I did however enhance it slightly. This is an easy trick though. Create a layer in photoshop and set it to color mode with about 20-30% opacity. Then chose a deep rich color and paint on your layer. The color will be applied to the image. I made several different color layers with different tonalities and opacities to achive the desired look. The rope was also traffic cone orange in the original image. I toned it down by adding a slight green on one of my color layers. Finally I increased the saturation and contrast slightly, watching carefully to avoid loosing information in the highlights and done! The 24x36 gallery wrap print is already set to be ordered and placed above my fireplace (with the images of his sister and brother of course) in just a few weeks.


Tuesday, March 30, 2010
Here a blog, there a blog, everywhere a blog, blog....
I will be guest blogging this week at http://www.mcpactions.com/blog/ so be on the look out. I'll be addressing the trouble some people have properly exposing when the subject is wearing white. After writing a rough draft I decided I needed some specific photos for this post. Then I remembered its time to update my facebook and twitter profile, and I have a super cute white shirt. So one thing led to the other and it became a portrait session for Terice and I. Mind you I take photos of Terice all the time, (she's my muse/assistant).
Additionally if you are following this blog and haven't checked out my studio's blog now is a great time! Until April 10 you can buy a gift certificate for a future session and 100% of the proceeds will go to support the American Red Cross. This is an extension of the Helping Haiti Through Photography Event we held on March 27th. And if you are tried of hearing about the event know that I WILL NOT stop talking about it until enough money has been raised to meet the goal I set for donations. So donate now even if its for no other reason then to make me shut my big trap.
Speaking of our charity event, here's some favorites. All of these shots used the same lighting pattern, as shown in the diagram below. I love the soft diffused quality of light, don't you?


 .All shots are at 200 ISO with 1/200 shutter speed and f4-f8 aperture depending on the subject.

Additionally if you are following this blog and haven't checked out my studio's blog now is a great time! Until April 10 you can buy a gift certificate for a future session and 100% of the proceeds will go to support the American Red Cross. This is an extension of the Helping Haiti Through Photography Event we held on March 27th. And if you are tried of hearing about the event know that I WILL NOT stop talking about it until enough money has been raised to meet the goal I set for donations. So donate now even if its for no other reason then to make me shut my big trap.
Speaking of our charity event, here's some favorites. All of these shots used the same lighting pattern, as shown in the diagram below. I love the soft diffused quality of light, don't you?


Tuesday, February 16, 2010
Supporting the Hatian Releif Effort: Portrait Event!

I'm a news junkie. I guess I learned that from my Dad. Growing up I watched Dan Rather and pretended I was a correspondent stationed in remote parts of the world reporting on all sorts of world events. Even though I was very young when it happened, I still remember vividly watching footage of the Tiananmen Square Protest on 1989. I couldn't help but feel helpless just watching these events unfold on TV. I wanted to be able to do something but at eight years old my circle of influence was slightly diminished.
It's been over a month now since the Earthquake leveled most of Haiti. It pains me that while these people are still suffering greatly, and conditions continue to deteriorate, that one of the greatest disasters in my lifetime has nearly fallen out of the news cycle. Our lives go on and our attention spans seem only to last as long as a commercial break.
I'm not eight years old anymore and I cannot help but feel a strong obligation to give all that I can to help those in need. I am now in a position where I can make a difference and dispel that terrible feeling of helplessness that I remember from my youth. I encourage all of you donate to the organizations on the ground in Haiti such as the red cross, salvation army and other charities with a track record of good works.
Donating is a great thing, but I also wanted to do more. And short of leaving my young family to go to Haiti myself, I've decided to use the resources available to me here at home to increase the good I can do.
Saturday March 27th my studio will holding a portrait event. 100% of all proceeds from this event will be donated to the Red Cross.
Doors will be open between 9am and 6pm on the 27th. Both walk in and scheduled appointments available. Each portrait session will be up to 15 minutes in length and free of charge. Children of all ages, families, and pets are encouraged to attend! Please call and schedule a session for any pets please. Once your session is completed you may choose one of the following print packages for your favorite image.

-2 5x7 prints
-4 wallets
$25.00
Package 2:
-1 8x10 print
- 2 5x7 prints
-12 wallets
$50.00
Package 3:
-1 8x10 prints
-4 5x7 prints
-5 4x6 prints
$85.00
Package 4:
- 16x20 print
- 25 4x8 photographic cards
$125.00
Package 5:
- 11x14 print
-2 8x10 prints
-10 4x6 prints
-25 4x8 photographic cards
$ 175.00
Add On Prices:
2 Wallets - $5.00
1 4x6 - $5.00
1 5x7 - $10.00
1 8x10 - $25.00
1 11x14 - $50.00
1 16x20 - $100.00
25 4x8 photographic cards - $20.00
If you would like to purchase additional prints from your session all photos will be posted at our website Irene Jones Photography Online with in 1 week. Any additional print sales will also be donated to the Red Cross.
All packages will be available for pick up at our studio on April 3rd, Just in time for Easter! Cash and Check donations preferred but credit card donations also accepted. For more information or to book your session time please call 425.367.4781.
Our studio is located at 2110 Broadway, Everett WA 98201. Click here for directions.

If you are unable to attend I encourage you to please visit the Red Cross Website today and donate directly today. View the Red Cross's report on what they are doing in Haiti now.
Thursday, January 28, 2010
Website Update complete!
Caleb pulled a few all nighters but it's done! Our website's update for 2010 is complete. New packages, portfolios, and a more interactive layout have been added. I'd love to know what you think. And please, let me know if find typos or have any issues with navigation. Your comments will help us improve our client's experience. Thanks for checking it out!
Saturday, January 23, 2010
Night Portraits

I've talked a lot lately about indoor lighting and I felt a little claustrophobic so into the chilly air we went. During the hour we were shooting we met a whole host of street life in downtown Everett and tried hard to make James smile to no avail.
This shot is straight forward enough. Two speedlights, one for each guy and a slow shutter speed. Because the flash freezes the action I didn't have to worry about them being sharp. I just had to put my camera on a tripod and wait for a car to pass behind them. At one point a bus drove by and the blur was great, only problem was both guys blinked.
This is a decent shot, not exactly what I had in mind but it will do for tonight. I had a client meeting and we were running out of time, so Terice and I will have to try again next week. I do like having the guys at opposite sides of the frame though.
Here's the set up.

Exposure was 1/8 @F4.5. ISO 200 with 50mm lens.
Thursday, January 21, 2010
Using Indoor lighting for Creative Portraits

Exposure: 1/100 @ f 2.2 IS0 400
Just for fun I took two photos and combined them in photoshop. Here are the two images I used.


The left is shot with a 50mm and the bokah shot is 300 mm.
Saturday, January 2, 2010
Focal Length and Aperture

Shallow depth of field must have been designed with babies in mind. See the soft edges just beyond his little ear? It helps to bring your attention right to his darling little sleepy face.
The next image was shot with our little guy in the same position, I simply moved above him. (Yes, I posted this photo the other day but I wanted to illustrate a point so I'm showing it again.)

Sunday, December 27, 2009
Fun times for my 5 year old

One of the hardest parts about photographing people is simply the barrier between you and your subject that the camera creates. Here are a few simple tricks that have worked for me to help disarm and even find a personal connection with clients (weird I know).
- Talk to your subject! Before I even start a session I take time to meet with my clients, discuss what they like, dislike and learn a little about them. I even let the conversation digress into random small talk since the whole point is to learn more about them. Then when we start shooting, I continue talking! A gift of gab can be very useful. Another key tool is listening. Search what the client is telling you for details that will give hints about that person's personality that you can then reflect in their images.
- Walk your client through the photographic process. Chances are that if you work with the general public they aren't in front of the camera every day and won't know what to expect or how to act. Explain what you are looking to achieve and complement them when you like what you see.
- Provide motivation. If you want a particular emotion, help the client feel the sentiment you desire. If you want a true smile make the client laugh with a self deprecating joke, silly prop, etc. A laughing smile means the corners of the eyes will also turn up, erasing any faked smile. I've been known to anything for a laugh. Having a good joke on hand is always helpful, or an assistant that will dance on command! Terice over the last 4 years has been the butt of many jokes that have helped to produce many great images. Thanks for taking one for the team Terice!
- Ask for input. Over the years a number of my favorite shot ideas have come from clients. Remember you aren't the only creative person alive!
- Step out from behind the camera. If you have a client that can converse with you easily but becomes stiff when you look through the viewfinder, then back away. Put the camera on a tripod and grab a remote shutter release and strike up a conversation. This works great for kids. I start playing with them and then hit the shutter release when the smile appears. Plus it adds the element of surprise since the subject doesn't know when the photo will be taken.
- Keep in mind that some times luck is always a factor in photography. Keep your reflexes sharp and chances are the fortunes may smile on you.
Sunday, December 20, 2009
Tips that will Help any Mom Shoot like a Pro.
This is a re-post from my business blog done in October 2009. I have two sick kids tonight and I thought this article worth another look. Enjoy!
Yesterday a friend of mine and I photographed her daughter in my studio. My friend is an amateur photographer, but a quick study. Hanging out with her and sharing some tips on how to use her fancy new camera gave me the idea of posting a few tips for every Mom or Dad who wants to take better photos of their kids at home.
1. Loo k for great light: Forget your on camera flash.
Either take your kids outside and use the best light source in the universe (you know, the Sun?) or during the day use the lovely soft light of a window, skylight, or open door. Keep in mind that photographs are a 2 dimensional representation of a 3 dimensional object. Using the on camera flash creates flat, straight forward lighting that will make your kids look lifeless and many times, overexposed. If you are using a SLR camera you can adjust your ISO to increase the camera's sensitivity to the light. Keep in mind this also increases noise. Many point and shoots also allow you to increase your ISO or they automatically adjust to lower light. Most of all keep in mind that photography is all about light and that it might not be a good idea to always shoot in low light conditions if you want good images. In the image to the left you can see a slight shadow on the left side of Hannah's face. Here the light source was from my right side, about 45 degrees from me and the camera. This subtle shift in the direction of the light makes her look natural. The flat lighting of an on camera flash would have also created harsh shadows under her chin and along one side of her body; not attractive. Good images have a great balance of light and shadow. In summary; they mimic the way our eyes are used to seeing things in real world.
2. Pay attention to your shadows.
Once you've found a good light source, consider where your shadows are falling. If you are photographing your kids outside, think about the time of day. Early morning and later in the afternoon will give you more dramatic directional shadows. I love to shoot people about an hour before sunset. The light is still enough to get a good exposure but no one is blinded when facing the sun. If you do happen to find yourself shooting at noon day, a good way to avoid harsh shadows is to find shade. ( I know, it sounds counter-intuitive, but just go with me here.) Find the shade of a large tree or the open shade of a building. In these spots the light is dispersed and you'll have less of a chance of unattractive shadows. If no open shade is available, try turning 45 degrees from the direction of the sun on a bright day. Luckily, if you live in the greater Pudget Sound, like me harsh shadows are rarely a problem between the months of November-June. Cloud cover provides a natural diffusion of the light (ie- the direction of the light is broken up as it passes through the clouds creating soft shadows and the same kinds of light you'll find in open shade).
3. Get Closer.
Not every image needs to be a panoramic photograph. Instead try to fill the viewfinder or screen with only information you want and nothing you don't need. Portraits are about p eople. Feel free to include them specifically. This doesn't mean you never take a full body shot of your kids, but it is good to think a little bit about how the composition will look and if additional "stuff" will be distracting.
4. Play with angles.
It's fun to see things from a new perspective. Try getting high above, or down low. Even tilting the camera a little so your subject isn't perfectly perpendicular to the horizon. Images photographed from eye level (the view you see normally when standing up) is well, boring. Mix it up. Just ask any of my clients. I'm not opposed to laying on the ground for a photo. Some of my favorites come from this angle.
This photo of Hannah is photographed from above which emphasizes her size and face.
5. Don't always worry if they are smiling. My favorite photos are many times the ones where you can see what the kid is thinking. Have fun with them, don't make them hate photo time by always requiring perfection. My kids love to have their pictures taken because I let them do whatever they want.

Now at 4 and 3, they have developed their own favorite poses and they even ask "Mommy, can we take pictures?" What I love about this last picture is the "baby pout" on Hannah's face. Those Gerber baby cheeks are accentuate and she's staring right at me. Plus look at how blue those eyes are? Super cute, but no smile. I love it.
Thanks Heidi for the fun afternoon and such a cooperative model.
Yesterday a friend of mine and I photographed her daughter in my studio. My friend is an amateur photographer, but a quick study. Hanging out with her and sharing some tips on how to use her fancy new camera gave me the idea of posting a few tips for every Mom or Dad who wants to take better photos of their kids at home.
1. Loo
 k for great light: Forget your on camera flash.
Either take your kids outside and use the best light source in the universe (you know, the Sun?) or during the day use the lovely soft light of a window, skylight, or open door. Keep in mind that photographs are a 2 dimensional representation of a 3 dimensional object. Using the on camera flash creates flat, straight forward lighting that will make your kids look lifeless and many times, overexposed. If you are using a SLR camera you can adjust your ISO to increase the camera's sensitivity to the light. Keep in mind this also increases noise. Many point and shoots also allow you to increase your ISO or they automatically adjust to lower light. Most of all keep in mind that photography is all about light and that it might not be a good idea to always shoot in low light conditions if you want good images. In the image to the left you can see a slight shadow on the left side of Hannah's face. Here the light source was from my right side, about 45 degrees from me and the camera. This subtle shift in the direction of the light makes her look natural. The flat lighting of an on camera flash would have also created harsh shadows under her chin and along one side of her body; not attractive. Good images have a great balance of light and shadow. In summary; they mimic the way our eyes are used to seeing things in real world.
2. Pay attention to your shadows.
Once you've found a good light source, consider where your shadows are falling. If you are photographing your kids outside, think about the time of day. Early morning and later in the afternoon will give you more dramatic directional shadows. I love to shoot people about an hour before sunset. The light is still enough to get a good exposure but no one is blinded when facing the sun. If you do happen to find yourself shooting at noon day, a good way to avoid harsh shadows is to find shade. ( I know, it sounds counter-intuitive, but just go with me here.) Find the shade of a large tree or the open shade of a building. In these spots the light is dispersed and you'll have less of a chance of unattractive shadows. If no open shade is available, try turning 45 degrees from the direction of the sun on a bright day. Luckily, if you live in the greater Pudget Sound, like me harsh shadows are rarely a problem between the months of November-June. Cloud cover provides a natural diffusion of the light (ie- the direction of the light is broken up as it passes through the clouds creating soft shadows and the same kinds of light you'll find in open shade).
3. Get Closer.
Not every image needs to be a panoramic photograph. Instead try to fill the viewfinder or screen with only information you want and nothing you don't need. Portraits are about p
 eople. Feel free to include them specifically. This doesn't mean you never take a full body shot of your kids, but it is good to think a little bit about how the composition will look and if additional "stuff" will be distracting.
4. Play with angles.
It's fun to see things from a new perspective. Try getting high above, or down low. Even tilting the camera a little so your subject isn't perfectly perpendicular to the horizon. Images photographed from eye level (the view you see normally when standing up) is well, boring. Mix it up. Just ask any of my clients. I'm not opposed to laying on the ground for a photo. Some of my favorites come from this angle.
This photo of Hannah is photographed from above which emphasizes her size and face.
5. Don't always worry if they are smiling. My favorite photos are many times the ones where you can see what the kid is thinking. Have fun with them, don't make them hate photo time by always requiring perfection. My kids love to have their pictures taken because I let them do whatever they want.

Thanks Heidi for the fun afternoon and such a cooperative model.
Saturday, December 12, 2009
Studio Lighting Basics: Part 2 Using a fill light.
 If you did your homework yesterday and studied the vocabulary words I gave you, then you are ready to talk about using fill. There are a lot of different methods for adding fill light. The easiest is using a fill card or reflector. I have white foam core (the kind used for mounting prints) in a couple of sizes that I use for fill cards. I also have a collapsible 4-in-1 reflector that I take everywhere. The reflector is far more portable then the foam core but both are often needed when trying to use one light head to create two sources of light.
Our first picture (top left) is with a single light head placed at 45 degrees from the subject (my husband) and me on camera left. You can see how the contrast between the highlights and shadows is pretty dramatic and a good portion of the face is quite dark. On the second image I added a white fill card. Notice how the shadow side is now about a half stop lighter? The lighting ratio has gone from 4:1 to 3:1. Most traditional portraits are either a 2:1 ratio since it allows for some shadow but there is still detail. (See earlier posts for more info on this subject.) The fill card is positioned at 90 degrees from Caleb. Next the white fill card is replaced by a silver reflector. The quality of light on the shadow side has changed. The silver reflector is brighter then the white fill card. Now we're up to a 2:1 ratio. Finally I flipped the reflector over to the gold side. The intensity of the light is about the same as the silver side, but the color shift is the most obvious change.
 Keep in mind a reflector does just that, it only can bounce light already available in a new direction. If you want a greater intensity or light from an angle not directly proportional to your main light you'll need to use flash as your fill. On the next image (right) you can see the fill light on camera left bringing up the shadow side of his face to be as bright as the main light, maybe even a little brighter. Because the fill is positioned slightly behind the subject instead of next to him like a reflector might be, a small sliver of shadow is created along his temple and cheek bone. This kind of lighting style really adds three dimensionality to the image. The key light is diffused where the fill is not, and because of the angle, the fill light has become very textural.
Can you guess how old this kid is? Would you believe me if I said 3? It's true, the posing and lighting make him look older then his age and I did this intentionally. I had plenty of photos of him being goofy like all little boys are, what I wanted next was something that spoke to a different emotion. Unlike shooting on location where you have a sense of place to help tell a story, in the studio you have only the light and your subject. Light is your only tool to create a fresh perspective. That challenge alone is what keeps my job new and interesting.
 Before anyone asks, about how I got the white background to be clean and even I'll admit that I did something I don't normally do, I used the fill light as both a background and fill light simultaneously. Most of the time I use a light for the background separately since I want to be able to control each layer of the scene, but I was able to get away with this for a few simple reasons.
The background I used was only 5' wide and my subject is standing pretty close to it. Normally I try to put distance between the subject and the background so no shadows fall on the vertical plain, but I didn't need to worry about this because the fill light was positioned in such a way that it's light illuminated both the side of the subject and the background. The fill light was powered to full and with it's close proximity to the background it was far more intense then the main light which was only at half power. This is what caused the background to loose all detail since the camera's exposure was set to match the main light's setting. (1/320 @ F6.3 with ISO 200) In simpler terms, I over exposed the background.
Next up we will talk more in detail about shooting on a white background and the traditional three light setup that has defined studio portraiture.
Friday, December 11, 2009
Studio Lighting Basics: Part 1 "Feel the Light"
In college one of my more ego maniacal instructors (keep in mind they ALL fit into this category) brought in a single light head on a stand with a soft-box to class. He had the entire group stand with arms out in front of it repeating "I feel the light!" as if we were impersonating a gospel choir. His point? At a certain level you need to act instinctively about how you use light. Studio photography is the best example since you have complete control over every light source and direction. So I want to take the next few days and go over some of the basics about how to light in a studio and why the classics work so well. Then I want to talk about breaking out of the box and doing things differently. That's where the whole "Feeling the Light" really matters. So please to anyone reading, take what you see here, and apply these techniques creatively; by all means make it your own! That's what art is all about, yes? I'll provide the method you're responsible for the mood.
First thing first, think of light as your most basic tool. Keep in mind how changing light alters the emotion of an image and where it's placed is the key to telling a subject's story. And everything has a story. How interesting it is, well, that's up to you.
So let's start with some lingo.
Key (or main) Light: Just what it sounds like. This is normally the brightest light in the set up. Often times it's that big glowing ball in the sky.
Fill Light: This is the light, or sometimes a reflector that fills in the shadows to help reduce contrast or illiminate shadows all together.
Background Light: The light that illumniates the background.
Hair Light or Rim Light: A light positioned behind the subject and sometimes what helps to separate the subject and background from one another.
Monolight: Flash unit that is self contained and uses AC power.
Lens Flair: Light that is reflected back into the camera lens. Not fun to try to remove in post processing.
Lighting ratio: A mathematical way of describing how bright the main light is compared to the fill light.
Wireless Remote: Sounds redundant I know, but these little guys, AKA radio transmitters, signal flash units from the camera so all units fire simultaneously.
Diffuser: A device used to disperse light and soften shadows. A few popular ones are: softboxes, unbrellas (reflective and translucent) a beauty dish and diffusion sock, etc.
Specular Highlight: A bright spot of light that appears in shiny objects. Often called catch lights when observed in portraits, this is the glow you see in people's eyes. It is also the easiest way to determine how a photograph was lit. I simply look for the reflection in the subject's eyes to tell me how to recreate the same shot.
Reflector: A surface that reflects light. (Obvious I know) They come in many varieties. Gold and silver reflectors add either a warm or cool tone to an image where white stays color neutral. The bigger the reflector, the more diffused the light. The closer the reflector is to the light source the greater the intensity of the reflected light.
Okay let's start off small. Let's talk about lighting with just a key light and go from there.

All you Anne Geddes fans here's a knock off for you. This image used a single key light and my husband draped in black fabric. I know what you're thinking, and no he won't wax his arms for a re-shoot. This kind of image is very popular (can't quite figure out why) and easy to do. My key light was a single unit pointed towards the ceiling at a 45 degree angle to give it some direction and its positioned a little bit off of camera right. By pointing the light up it filled the whole room and broadly lit both baby and my toga wearing husband. ( I should have gotten a photo of him to show you. Especially since the whole thing was held on by a few "A" clamps in the back. Pretty hilarious actually.) Here's a diagram to help illustrate. I used an umbrella since it was already on the light-stand and any extra diffusion is okay with me, but the ceiling is really what did the work. As I said before, the larger the area light can reflect off of, the more dispersed it will be. Nine foot ceilings painted white are a portrait photographer's best friend when on location. Luckily for me the same trick works in my studio as well.
 One thing I do need to mention here is that this lighting method (sometimes referred to as a broad lighting pattern) means that in the original image there was a good amount of detail visible in the black material around Caleb's body. There are two ways to correct this:
One thing you have be careful of when using one light source is separation. Does the shadow areas on your subject blend into the background? This mistake is most commonly made when the subject has dark hair and the background is black or they have on dark clothing. It creates what I like to call FHS or Floating Head Syndrome. Again this reinforces the point I made earlier, you must "Feel the Light" and that means controlling it! When one light won't do, you add another, or a reflector, until you've correctly lit your subject in a way that is pleasing and distinguishable.
Tomorrow we'll expand on this same idea and move up to two lights sources.
First thing first, think of light as your most basic tool. Keep in mind how changing light alters the emotion of an image and where it's placed is the key to telling a subject's story. And everything has a story. How interesting it is, well, that's up to you.
So let's start with some lingo.
Key (or main) Light: Just what it sounds like. This is normally the brightest light in the set up. Often times it's that big glowing ball in the sky.
Fill Light: This is the light, or sometimes a reflector that fills in the shadows to help reduce contrast or illiminate shadows all together.
Background Light: The light that illumniates the background.
Hair Light or Rim Light: A light positioned behind the subject and sometimes what helps to separate the subject and background from one another.
Monolight: Flash unit that is self contained and uses AC power.
Lens Flair: Light that is reflected back into the camera lens. Not fun to try to remove in post processing.
Lighting ratio: A mathematical way of describing how bright the main light is compared to the fill light.
Wireless Remote: Sounds redundant I know, but these little guys, AKA radio transmitters, signal flash units from the camera so all units fire simultaneously.
Diffuser: A device used to disperse light and soften shadows. A few popular ones are: softboxes, unbrellas (reflective and translucent) a beauty dish and diffusion sock, etc.
Specular Highlight: A bright spot of light that appears in shiny objects. Often called catch lights when observed in portraits, this is the glow you see in people's eyes. It is also the easiest way to determine how a photograph was lit. I simply look for the reflection in the subject's eyes to tell me how to recreate the same shot.
Reflector: A surface that reflects light. (Obvious I know) They come in many varieties. Gold and silver reflectors add either a warm or cool tone to an image where white stays color neutral. The bigger the reflector, the more diffused the light. The closer the reflector is to the light source the greater the intensity of the reflected light.
Okay let's start off small. Let's talk about lighting with just a key light and go from there.

 One thing I do need to mention here is that this lighting method (sometimes referred to as a broad lighting pattern) means that in the original image there was a good amount of detail visible in the black material around Caleb's body. There are two ways to correct this:
- GOBO the light. This stands for "GOes Before Optics" and is basically anything that is dark that will be put in front of a light source to change how it looks. Black matt board is a cheep and easy solution. Hang a few of these from light stands or have an assistant hold them in place so as to remove light that was falling on spots it shouldn't be.
- Use the Dodge and Burn tool in Photoshop.
One thing you have be careful of when using one light source is separation. Does the shadow areas on your subject blend into the background? This mistake is most commonly made when the subject has dark hair and the background is black or they have on dark clothing. It creates what I like to call FHS or Floating Head Syndrome. Again this reinforces the point I made earlier, you must "Feel the Light" and that means controlling it! When one light won't do, you add another, or a reflector, until you've correctly lit your subject in a way that is pleasing and distinguishable.
Tomorrow we'll expand on this same idea and move up to two lights sources.
Thursday, December 10, 2009
Why reshooting isn't a bad thing.
My husband told me a story yesterday about a co-worker of his who's relative heard about this blog and has a lot of love for photography. Apparently he's now following my blog like a religion and trying to do some of the techniques I've written about. I'm completely flattered and shrinking under the mounting pressure. I can't spell for my life and my grammar is terrible. To all my unseen minions I hope none of you can read past an eight grade level and my slaughtering of the English language goes unnoticed. Seriously though, a big thanks to anyone taking the time to read my self-aggrandizing propaganda that some might confuse with a photography guide.

Now please forgive me as I post more photos of my son. He's a month and two days old now and I can't help but think he's getting cuter every day. He started smiling at me (but only when the camera is put away of course) and I can't wait to catch a big fat smile and post it all over the internet. The first shot shown was done at my studio the other night. This is as close to a smile as he would give. Just watch this child will be my "serious one" and I'll end up with thousands of images of his first year, all of which lack facial expression.
The next image is my re-shoot of the Christmas card photos. This is more of what I was originally thinking when I designed the shot in my head. Sometimes it takes several re-shoots before I get an image just right and honestly I think it's a good thing to revisit an idea until you've perfected it. For me making an image is often like a chemistry experiment; that is, you need to apply the scientific method. Let's compare the two:

I'm still not perfectly happy with this shot. I may shoot again until it's exactly what I see in my mind. I am thinking of using a wider angle and bring Alex a lot closer to the camera to make him larger in the frame so more of the Christmas tree is visible. I also want a more pleasant look on his face. Still haven't decided if I should put him back in the box. I know that the white wrapping paper, though a nice idea, didn't look as good as I had hoped. Plus I need to do this shot before he's old enough to talk back.
If I decide to do this shot again I'll post results. Until then I have plans to discuss studio lighting for the next few days. There is a lot of tutorials about shootings on a white background floating around the world wide web. I'm going to add my own say on the matter as well as how to shoot on black backgrounds.

Now please forgive me as I post more photos of my son. He's a month and two days old now and I can't help but think he's getting cuter every day. He started smiling at me (but only when the camera is put away of course) and I can't wait to catch a big fat smile and post it all over the internet. The first shot shown was done at my studio the other night. This is as close to a smile as he would give. Just watch this child will be my "serious one" and I'll end up with thousands of images of his first year, all of which lack facial expression.
The next image is my re-shoot of the Christmas card photos. This is more of what I was originally thinking when I designed the shot in my head. Sometimes it takes several re-shoots before I get an image just right and honestly I think it's a good thing to revisit an idea until you've perfected it. For me making an image is often like a chemistry experiment; that is, you need to apply the scientific method. Let's compare the two:
- First you must ask a question (or in the photographer's case, be given an assignment).
- Do research (consider the techniques and equipment the shot might require).
- Construct a hypothesis (location scout, draw diagrams and form a shot/pose list).
- Test with an experiment (shoot like there is no tomorrow)!
- Analysis and conclusion (Lightroom and Photoshop).
- Decide if hypothesis is true or false. Go back to step 3 if false (re-shoot.)
- Report results (blog about your image.)

I'm still not perfectly happy with this shot. I may shoot again until it's exactly what I see in my mind. I am thinking of using a wider angle and bring Alex a lot closer to the camera to make him larger in the frame so more of the Christmas tree is visible. I also want a more pleasant look on his face. Still haven't decided if I should put him back in the box. I know that the white wrapping paper, though a nice idea, didn't look as good as I had hoped. Plus I need to do this shot before he's old enough to talk back.
If I decide to do this shot again I'll post results. Until then I have plans to discuss studio lighting for the next few days. There is a lot of tutorials about shootings on a white background floating around the world wide web. I'm going to add my own say on the matter as well as how to shoot on black backgrounds.
Tuesday, December 1, 2009
How to blur a background with the lens blur filter

For this session we used some of my most portable studio backgrounds- white and black fabric. The white tends to be the most prone to wrinkling so prior to shooting I spent 2 hours (no joke) ironing it. I would have done the black too if I had time. So when I set up the black background it was of course a giant pile or wrinkles. There are two ways to get around this. 1. Shoot with a wide open aperture so the background naturally blurs in the camera or use photoshop to retouch out the wrinkles. Since the entire group was to be photographed on the black I had no choice but to shoot at maximum depth of field. For those images the exposure was 1/250 @F22. And you guessed it, every wrinkle on the background was visible. After a bunch of large group photos we did the parents/grandparents of this entire group and again even with less depth of field, still a messy background. Here is what the image above looked like before any editing.

- Make a duplicate layer and then use the lens blur filter (photoshop CS3 and higher) to blur the duplicate layer until the wrinkles pretty much disappear from the black background. For me these settings were as follows:
Radius: 61
Blade Curve: 41
Rotation: 63
All other settings at default
- Mask out the background from the people. I added a layer mask to the duplicate layer and using the paint brush I made my selection. You can also do this with the quick mask, or magic lasso, pen tool, etc. There are a hundred and one ones to mask in Photoshop. I chose the quick and dirty method since you don't have to be exact in this process just close. Basically I ran the paint brush along the shape of their bodies and then filled in the rest once the basic outline was done. It took about 3 minutes to do.
- You'll notice that the lens blur filter has a small outline where the background and people blur together. (see enlarged photo) You'll want to select the image on your duplicate layer (not the mask) and using the clone tool and healing brush I removed this. Since the background and subjects are each now visible from different layers thanks to the mask I made, I can get right up the edge of their hair and bodies without damaging the visible layer and distorting the couple.

- The next step is to add use the add noise filter to make the two different layers match in grain.You can see below how the added noise makes the two layers blend together better.

- Finally I merged the two layers and used the healing brush to touch up any last spots that didn't look smooth. The final result is a wrinkle free backgrounds, a look of a more shallow depth of field on the subjects and a suede-like quality to the fabric. Much better!

Now I must say something here about how important it is to try to do things right in camera so you don't spend hours fixing little mistakes in Photoshop. In my opinion, Photoshop is best used as a creative tool to enhance already creative and interesting images. It is not a substitute for correctly applied knowledge, the right equipment or an answer for lazying shooting habits. I spent 4 hours editing a dozen images with this black background. It would have taken me half the time to just iron the black fabric if circumstances allowed. As great as Photoshop can be, it's not the answer to ever photographic problem and I feel a good photographer shoots smart and does everything possible they can to create the best image when the shutter clicks and not hours of mouse clicks later. That being said, tomorrow: More photoshop tutorials!
If you would like to see more images from this session please visit my facebook page. Don't forget to become a fan!
Monday, November 30, 2009
Christmas Card

I've also included another version the same photo and separates of each of the kids we did at the end. Alex did his photos naked yet again, and I just as I went to pick him up he peed all over everything! Good thing I was done shooting. Notice that the shots below haven't been at all retouched since you can see the inside of the box Audrey is in. DOH!


Thursday, November 26, 2009
Photojournalism: A Thanksgiving in pictures
Today's post is the story of my Thanksgiving. I decided that the best way to capture it would be in the style of a photojournalist. This is the style of photography I use at weddings primarily. Photojournalism is about saying something without words. Telling a story that is honest and insightful. Technical proficiency is required to create great images that also convey a variety of emotions. A photograph becomes more then a snap shot when you can control the light, design the frame, and convey a message about the human experience simultaneously. This ability is what makes a professional photographer an artist in their own right. And telling stories is the reason I picked up a camera in the first place. So I'm hoping these photos from our Thanksgiving will speak for themselves and share with you the people that I thank God for everyday.

Alexander (my son at 2-1/2 weeks)

Cody (our dog) and Audrey at breakfast


Lyndze, my niece.

Malorie, my neice.


Left to right: Katielynn (younger sister), Terice (youngest sister)


(Harry is the only person I know that owns a "Garfield: The Movie" T-shirt and will unashamedly wear it in public.)


Katielynn, Terice, Vonda and Alex

All images were shot with Nikon D300, 16-85mm lens ISO 200. SB900 ans SB 800 speedlights positioned around the room in multiple locations and flash bounced off the ceiling for over all fill. SB900 set to manual full power and SB 800 to TTL +3.0 stops to create direction and allow for low ISO rating. Average exposure: 1/80 @ f4.5 .

Alexander (my son at 2-1/2 weeks)


Audrey making rolls for Thanksgiving dinner with me.

Tyler (left), Caleb (right) and Alex (lower right)

Lego Pirate (left) Tyler (right)


My Father, Terry


Left to right: Taylor (Niece), James (Best thing that ever happened to Terice)


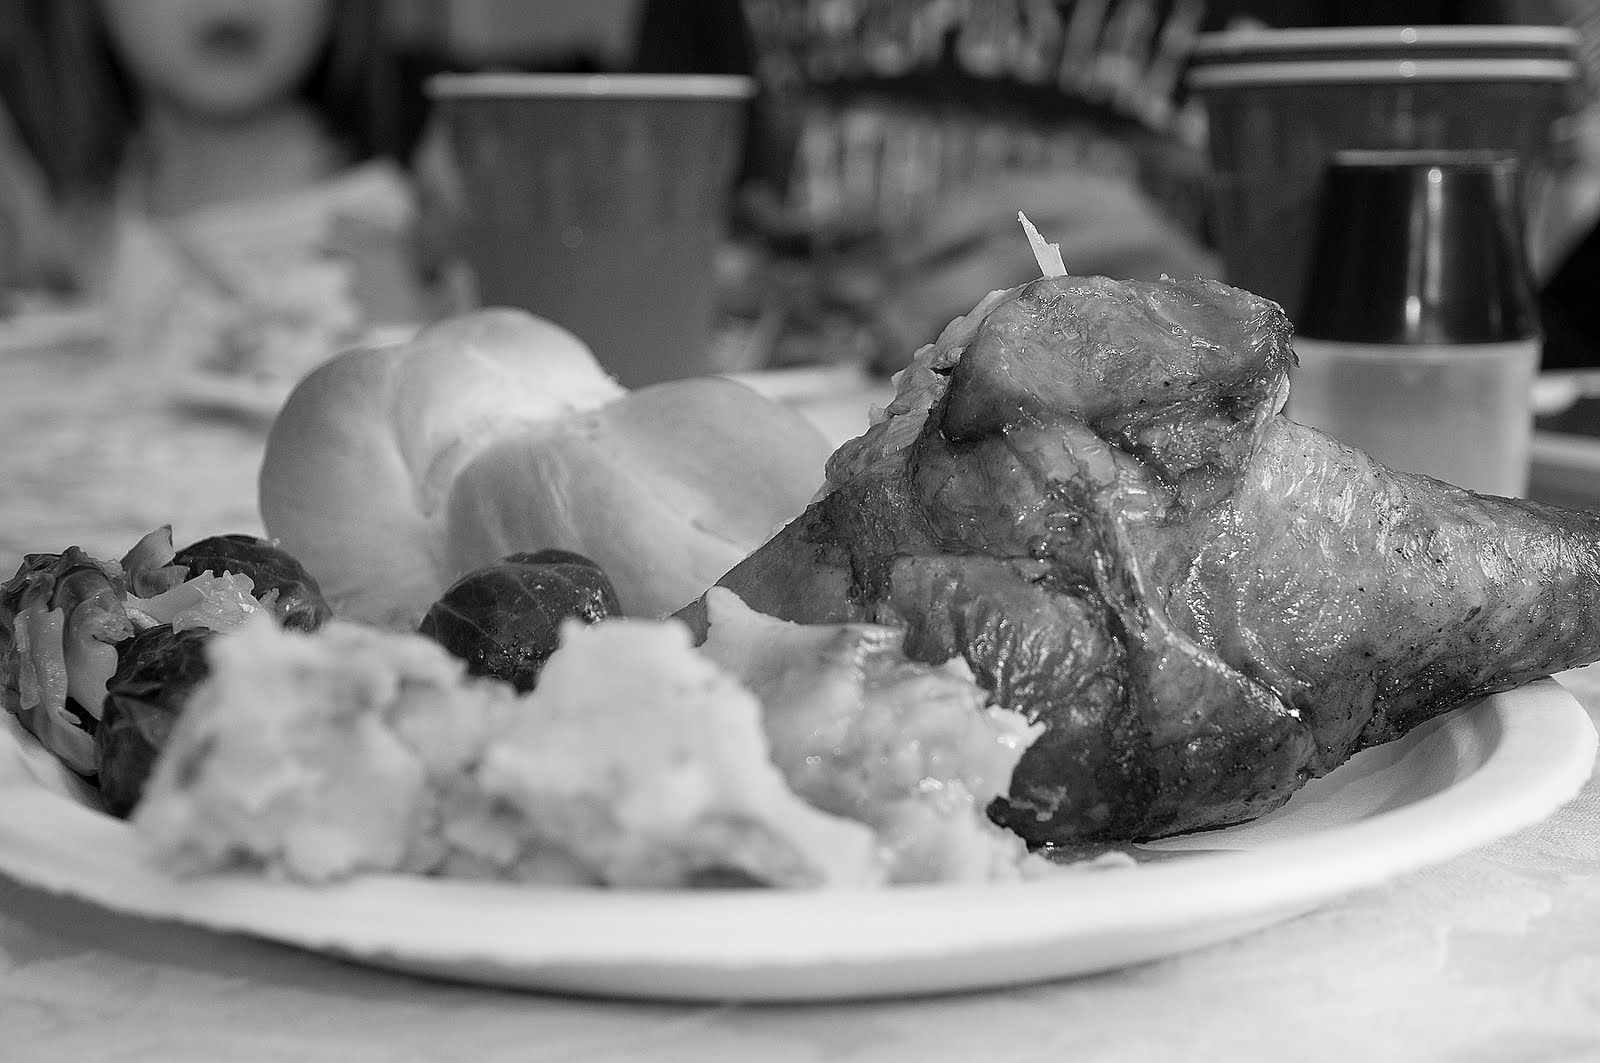


All images were shot with Nikon D300, 16-85mm lens ISO 200. SB900 ans SB 800 speedlights positioned around the room in multiple locations and flash bounced off the ceiling for over all fill. SB900 set to manual full power and SB 800 to TTL +3.0 stops to create direction and allow for low ISO rating. Average exposure: 1/80 @ f4.5 .
Subscribe to:
Posts (Atom)