Wednesday, April 14, 2010
Perfecting the Classic Pinup
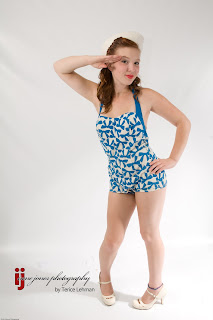
 When I first opened my studio Terice quickly grabbed some good friends, a bunch of vintage clothing, and promptly began photographing 40's style pinups. Her shots are closer to glamor shots then boudoir pinups (which I'm grateful for- not interested in seeing women objectified). I must say that her first solo attempt in the studio turned out some nice images. She used hard spectral lighting sources which matches the lighting style of the era and her posing and composition has a modern sensibility without detracting from the intent. She showed me the photos, I showed her how to avoid some of the pitfalls next time (mainly how to light the while background evenly) and we both moved on. Time passed and I totally forgot about the session until this morning when I started digging through my archives from last year looking for a photo to use on this blog. Here's what I found.
It's pretty cute, but this blog is about showing how to make something better, so I decided to give the image a tune up.
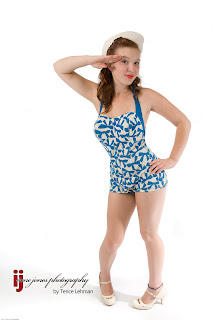
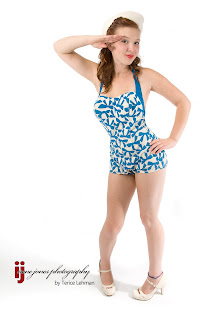
To get from the unedited version to the classic look of my edit is just a few simple steps.
- Use the Liquefy filter to create an unrealistic figure. Pinups were not originally photographs. They were drawings for one reason; normal women don't look like Pinups! These days every photo is doctored. No joke. Everyone wants to look better then they really do and the good people at Adobe have made that possible. If you've never used this tool before it's simple. Use the bloat tool to increase bust size and the forward warp tool to slim and reshape curves. (I just vomited in my mouth a little while thinking about the unattainable standards women are held to.)

- Then I cleaned up the background with the dodge tool. The image is high key so to ensure that I didn't dodge out her skin and hat I used the magic lasso set to 15 tolerance. This preserved the areas I wanted to keep while allowing me to dodge out sections quickly.
- Once the background was a clean white I dodged out the shadow to make it softer. One thing was still off, she needed to look freakishly tall and leggy. So I used the marquee to select her legs and then used free transform to stretch them out.

- The final step was adjusting the color. Using levels to brighten her face while masking out her legs gives her a more consistent lighting pattern. I wanted a saturated, warm skin tone, as if the image had been shot with Tungsten lights on a daylight balance. I also wanted to add a little bit of that "old drawing" feel. So it was natural to apply one of photoshop's standard filters "water paper" on a duplicate layer. Fiber length was set to 1, brightness 60, and contrast 80. Once the filter applied, I set to the mode to soft light at 78%.
Subscribe to:
Post Comments (Atom)

awesome sight, irene. i found it a couple of weeks ago and have read all of your archived posts. could you give a litte more detail on lighting the white evenly? i know you have to overexpose it to get it white, but how do you best suggest to modify the light (or not), for an even spread?
ReplyDelete@ Anonymous
ReplyDeleteI simply use a 9" bell and point the lights at a 45 degree angle (one on each side of the background)at at the same height/distance from the white vinyl seamless. I always use modeling lights to make sure the spread of light is even and 1-2 stops over the exposure for the subject. I hope that answers your question.
thank you so much for answering. the largest bell i have is only 7", so hopefully that will work. i am doing a portrait this week and have been working on setting up, so will try that out. am i best metering the backdrop with all of the lights on, as the key may spill onto the background?
ReplyDeleteIrene,
ReplyDeleteStumbled on to your sight today. You do some great work. I've found your photos very inspiring and look forward to seeing and reading your future work.
this one is phenomenal,
ReplyDelete