Monday, November 30, 2009
Christmas Card

I've also included another version the same photo and separates of each of the kids we did at the end. Alex did his photos naked yet again, and I just as I went to pick him up he peed all over everything! Good thing I was done shooting. Notice that the shots below haven't been at all retouched since you can see the inside of the box Audrey is in. DOH!


Sunday, November 29, 2009
Wedding Albums
Today was insane. I had planned to photograph the kids for my Christmas card but it was a no go. Instead I'm posting the pages from a photo album I designed for one of my favorite weddings this year. Each photo you'll see below is a two page spread. The company I use for my custom album production is Renaissance the Book and their quality is astounding. The customer service is great too. The first image is the front (right side) and back (left side) cover. Books like this one start at $400 so any of you brides out there interested in what you see, give me a call!


Saturday, November 28, 2009
92 and still kickin'!

I on the other hand love the look of her wrinkles! They are beautiful to photograph. I know we live in a youth obsessed culture, but I still value age and the wisdom that can come with it. As long as I can remember my Grandma has been a personal inspiration to me. Late in her life she took up painting and is a very talented artist. She raised her four children in lets just say, humbling circumstances, endured two less then perfect marriages, all while retaining her positive outlook on life. She never stopped believing in true love and in her 80's finally found it, only to lose him a few years later to illness and medical malpractice.
While her vision and hearing are growing more dim all the time, her love of family, faith in God, and kind heart never fail. If I could be half the woman she is, I would consider my life richly blessed.
I want to publicly thank her for raising my Mother to be the charitable, family centered person she is. My Mom and I don't always see eye to eye, but we do share the same values, most of which my Mother learned from her Mother. This tradition is one I hope to keep with my own daughter. Some day she'll understand what it means to come from a family with a heritage of strong, noble women. I hope she is as grateful as I am for those that have gone before.
Now for you photographers out there, here's some info on the shot.

Exposure: 1/250 @ f7.1 ISO 200
The key light was for camera left with just a 7 " bell, no grid or diffusion so I could get a more textural light on her face. The fill light off of camera right was powered down to 1/3, then shot through an umbrella and bounced off the 8' high white ceiling. A hair light was used for separation off the background with a snoot. To make sure there was no light hitting the background, a black reflector was used to block the key light.
Tomorrow: Alex is back from his hiatous and posing for my Christmas card.
Thursday, November 26, 2009
Photojournalism: A Thanksgiving in pictures
Today's post is the story of my Thanksgiving. I decided that the best way to capture it would be in the style of a photojournalist. This is the style of photography I use at weddings primarily. Photojournalism is about saying something without words. Telling a story that is honest and insightful. Technical proficiency is required to create great images that also convey a variety of emotions. A photograph becomes more then a snap shot when you can control the light, design the frame, and convey a message about the human experience simultaneously. This ability is what makes a professional photographer an artist in their own right. And telling stories is the reason I picked up a camera in the first place. So I'm hoping these photos from our Thanksgiving will speak for themselves and share with you the people that I thank God for everyday.

Alexander (my son at 2-1/2 weeks)

Cody (our dog) and Audrey at breakfast


Lyndze, my niece.

Malorie, my neice.


Left to right: Katielynn (younger sister), Terice (youngest sister)


(Harry is the only person I know that owns a "Garfield: The Movie" T-shirt and will unashamedly wear it in public.)


Katielynn, Terice, Vonda and Alex

All images were shot with Nikon D300, 16-85mm lens ISO 200. SB900 ans SB 800 speedlights positioned around the room in multiple locations and flash bounced off the ceiling for over all fill. SB900 set to manual full power and SB 800 to TTL +3.0 stops to create direction and allow for low ISO rating. Average exposure: 1/80 @ f4.5 .

Alexander (my son at 2-1/2 weeks)


Audrey making rolls for Thanksgiving dinner with me.

Tyler (left), Caleb (right) and Alex (lower right)

Lego Pirate (left) Tyler (right)


My Father, Terry


Left to right: Taylor (Niece), James (Best thing that ever happened to Terice)


All images were shot with Nikon D300, 16-85mm lens ISO 200. SB900 ans SB 800 speedlights positioned around the room in multiple locations and flash bounced off the ceiling for over all fill. SB900 set to manual full power and SB 800 to TTL +3.0 stops to create direction and allow for low ISO rating. Average exposure: 1/80 @ f4.5 .
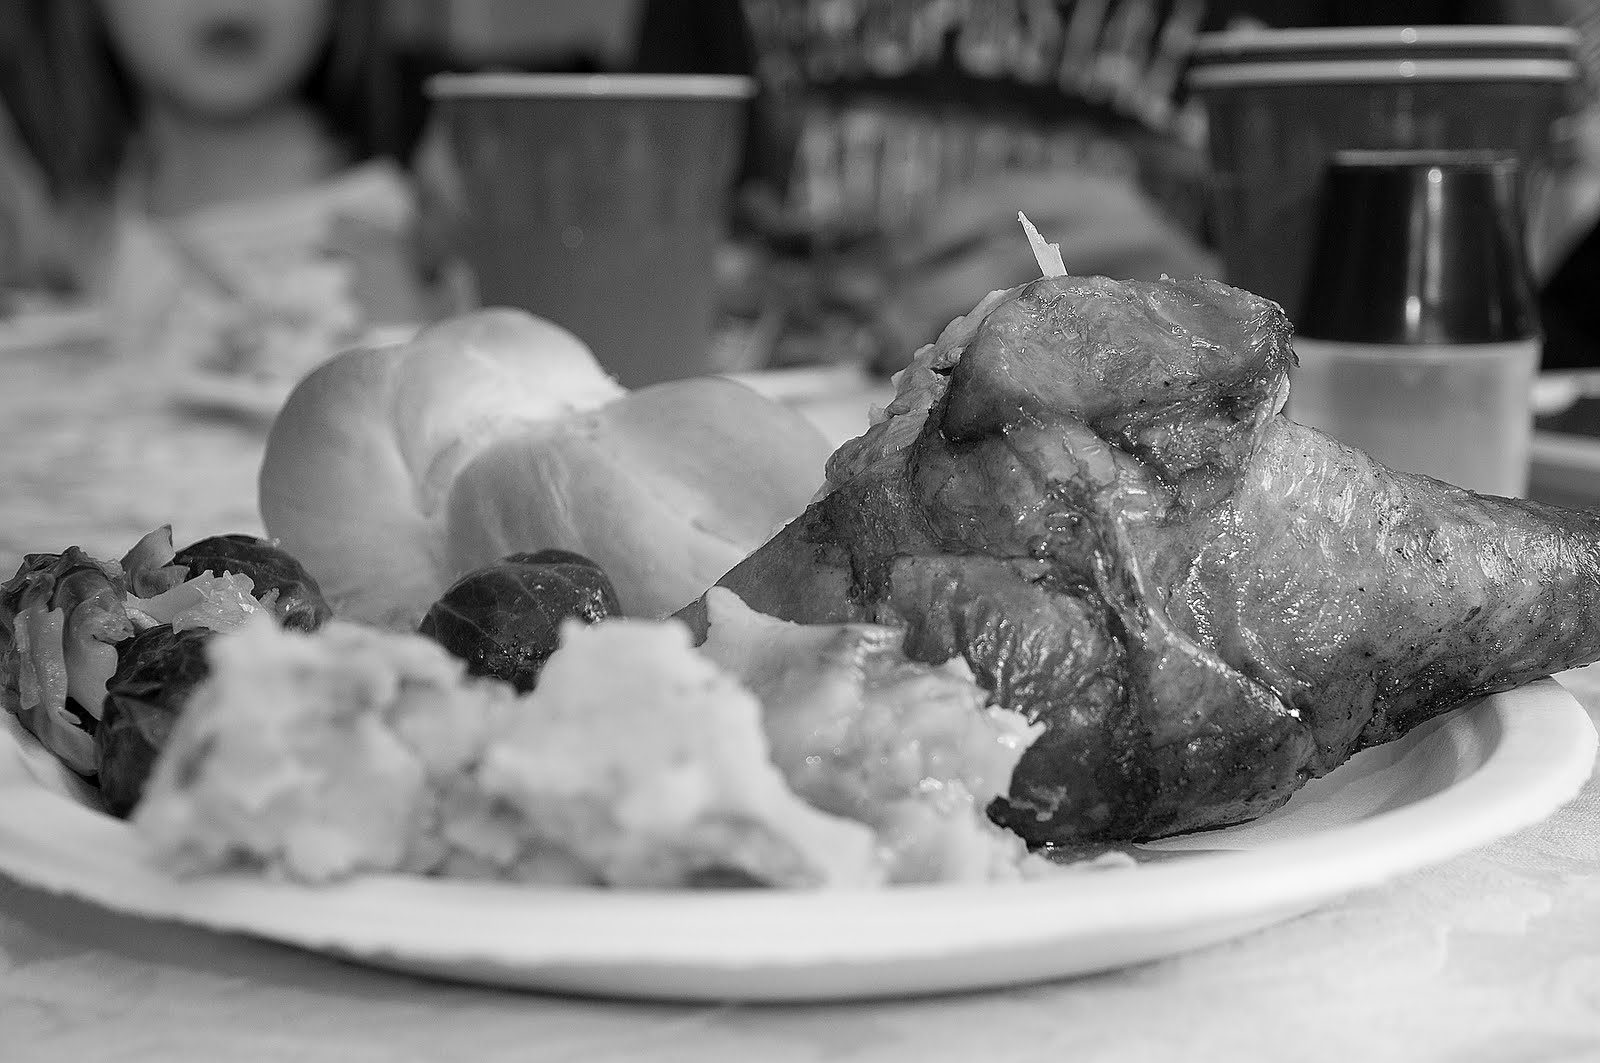
Turkey for you and turkey for me...

Food photography can be a lot trickier then it looks though, since there are a few basic rules that must be followed.

- Make the food look appitizing. If you don't want to eat it when you see the photo, your image is no good. This means clean bright exposures (not over exposed, just light backgrounds) so nothing suggests uncleanliness. We all would prefer our food germ free and light colors (white most especially) is associated with good hygiene.
- Show texture, and color accurately. Size matters too, make it look BIG.
- When possible create ambiance with the background. Use ingredients, more of the same dish, or anything else that logically makes sense with your food. (i.e. milk with cookies)

Traditional foods in my opinion are best photographed in a setting that makes one reminisce or pulls on old fashion values. Ethnic foods (for example Mexican) are best shot with a lot of color, so we think of a variety of flavors and spices. And some may argue (Anheuser-Busch) that alcohol is best photographed with half naked women. I say the jury is still out.
Here are a few things NOT to do:
- Show food with a bite taken out of it. No one wants to eat food some one else has already been eating.
- Include too much extra stuff. Keep it simple and focus in on the details.
- Leave crumbs on anything! Even if your food is naturally crumbly, get rid of them! Messy food is distracting.
- Photograph cold foods under hot lights. Talk about a quick way to end a shoot! If you have to shoot foods like ice cream use, a stand in. You can make your own fake ice cream at home, just don't eat it!
In case you were wondering, here is my recipe for the pumpkin chocolate chip cookies shown above. They are the best cookies on earth. It's as if there was a very sugary three way in my cookie jar between an oatmeal, pumpkin, and chocolate chip cookie.

Pumpkin Chocolate Chip Cookies
Ingredients- 4 cups unsifted all purpose flour
- 2 cups quick or old fashion oats
- 2 tsp baking soda
- 2 tsp ground cinnamon
- 1 tsp salt
- 1 ½ cup butter or margarine softened
- 2 cups firmly packed brown sugar
- 1 cup white sugar
- 1 egg
- 1 tsp vanilla
- 1 can pumpkin (16 oz)
- 1 package real milk chocolate chips
Directions
Preheat over to 350. Combine flour, oats, soda, cinnamon, and salt in a bowl and set aside. Cream butter, sugars, eggs and vanilla until very fluffy and light yellow (5 minutes or more with electric mixer). Alternate adding small amounts of dry ingredients and pumpkin into sugar/butter mixture. Beat after each addition. Stir in chocolate. Drop heaping tablespoonfuls onto greased cookie sheet. Bake for 25 minute or until cookies are firm and light brown. Cool on racks.Happy Thanksgiving Everyone!
Subscribe to:
Posts (Atom)